In this tutorial, I will show you the processes used to created this unique neon text effect in Photoshop. We will be using a number of Photoshop techniques such as layer masking, selection, blending options, pen tool and adjustment layers.
The PSD file of this tutorial is available via the PSD Vault VIP members area.
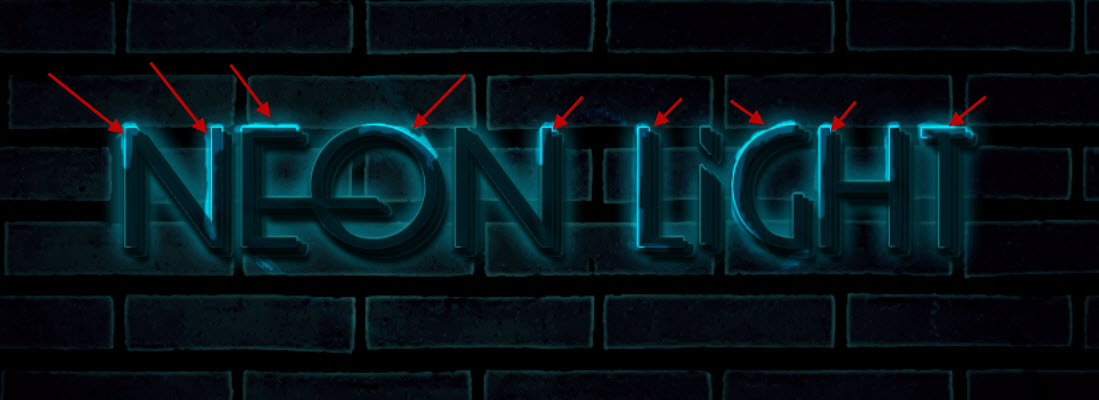
Here is a preview of the final effect I have for this tutorial: (click to enlarge)
![]()
PSD Vault VIP Membership
You can download the PSD File for this tutorial via the VIP Members Area for only $6.95/Month (or less)! You will not only get this PSD File, but also 300+ other PSD Files + Extra Goodies + Exclusive Photoshop tutorials there. Signup now and get exclusive :) Find out more about the VIP Members Areas

OK Let’s get started!
To complete this tutorial, you will need the following stocks:
Step 1
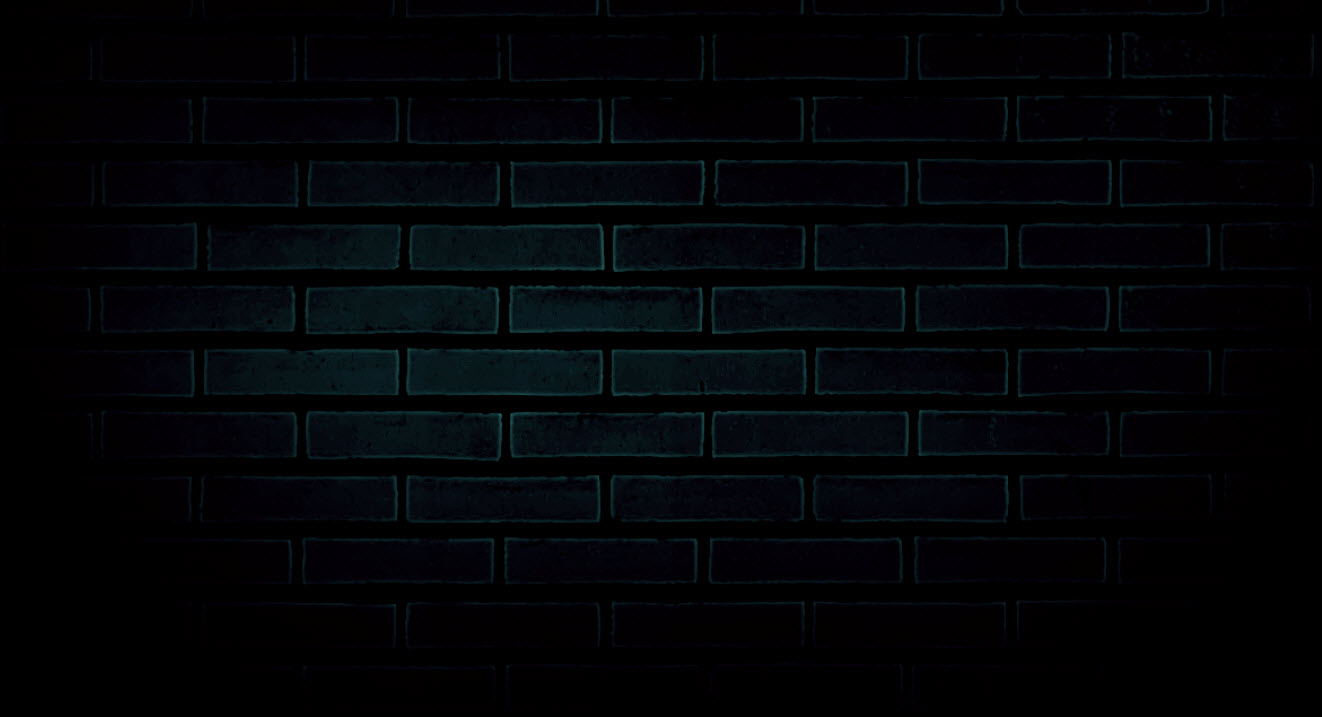
Create a new document sized 1400px * 782px with black background. Load the brick texture into Photoshop and select a portion of it with the Rectangular Marquee tool, we will use this as our background:

Copy and paste the selection over to our document and re-size it to fit our canvas. Apply the following Gaussian Blur filter to this layer:

Set the layer opacity to around 60%:

Apply the following layer mask to this brick layer to hide parts of it:

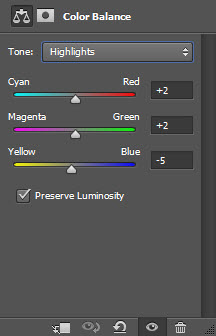
Apply the following color balance adjustment layer to add a bit of colour to the brick layer:


and you will have the following effect so far:
Step 2
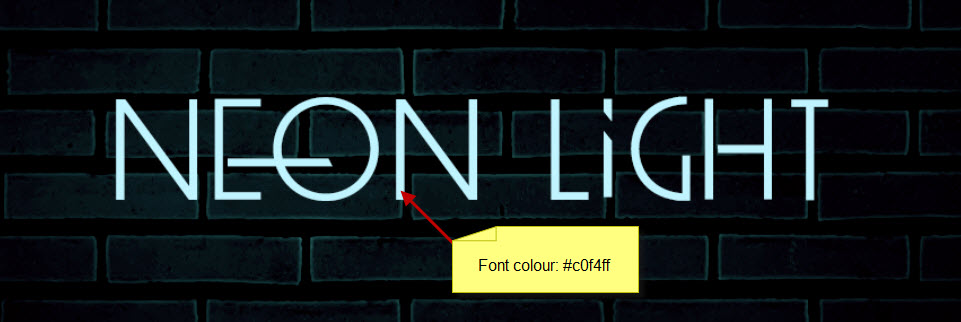
We will start working on the text in this step. Use the font we downloaded and type some texts using the colour shown below:
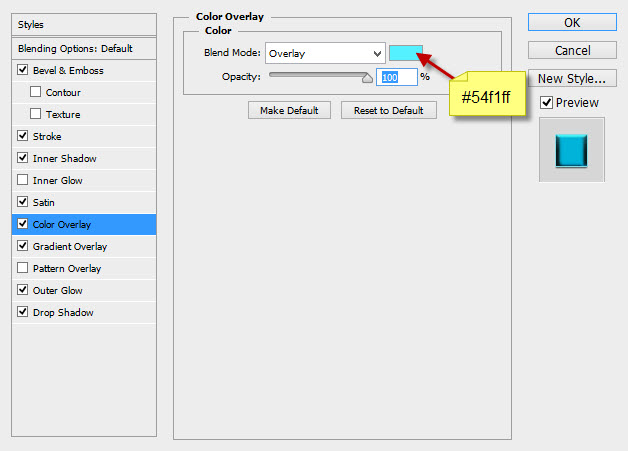
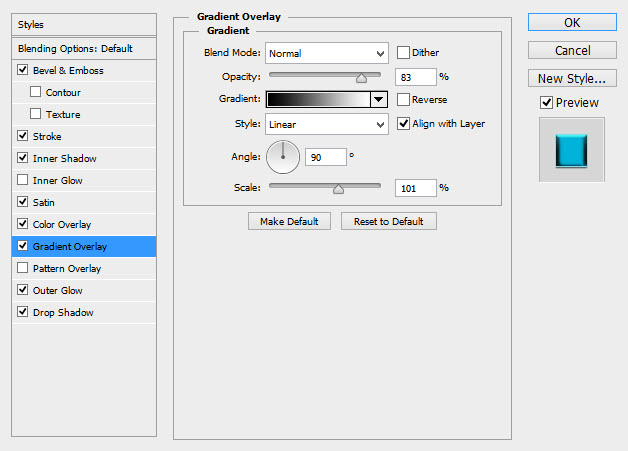
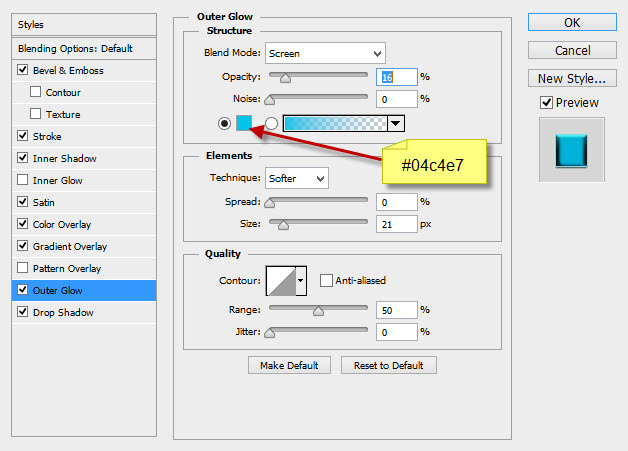
Apply the following layer blending options to this text layer:
Bevel and Emboss

Stroke

Inner Shadow

Satin

Color Overlay
Gradient Overlay
Outer Glow
Drop Shadow

and you will have the following effect so far:

Step 3
Duplicate this text layer once and move it slightly to the angle shown below:
Repeat the above process and duplicate more text layers, until you form the following effect:

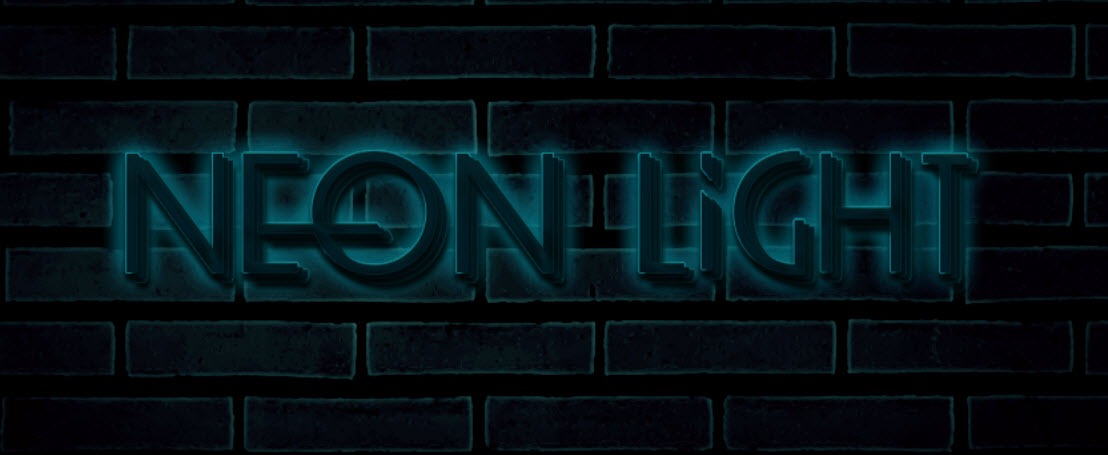
On the last layer you duplicated, apply the following Hue/Saturation adjustment and darken the layer as shown below:

and here is the effect so far:
Step 4
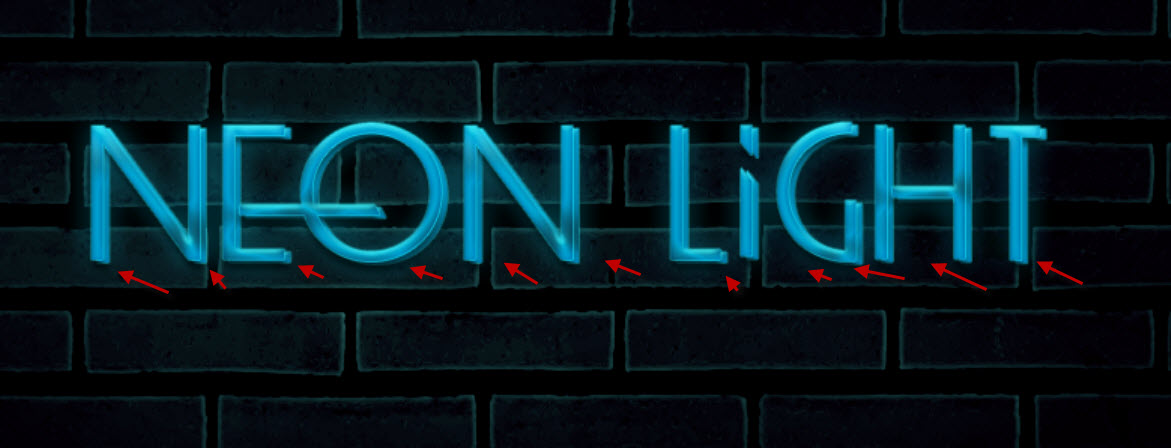
We will add some highlights around the text with a 6px, 90% hardness brush:

Set the brush to have the following colour:

Create a new layer above all previous layers and set its blending mode to “overlay”, and use the brush to paint over the following areas:
We can also add some smoke/cloud effect to the following positions, with a cloud brush or smoke brush:

and here is the effect so far:

Step 5
We will add some wires around text. Use the Pen Tool to draw a path as shown below:

Use 5px, hard brush, stroke this path:

Apply the following Bevel and Emboss layer blending option to this line:

And you will see the following effect:

Duplicate this wire layer a few times, adjust the size and shape of each duplicated layer, and attach them to each of the letters as shown below:

Step 6
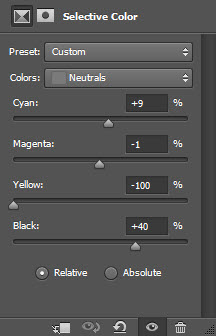
We’re almost done! To fine-tune this text effect, we can add the following adjustment layers on top:
Selective Color

Curves

and this is my final effect: (click to enlarge)
![]()
That’s it for this tutorial! Hope you enjoy going through it and find it useful. Drop me a comment below if you have any question.
Till next time, have a great day!


