
In this intermediate-to-advanced-level design tutorial, we are going to create a stunning space scene that has realistic-looking planets, stars, and lighting effects using a few innovative Photoshop techniques and some textures.
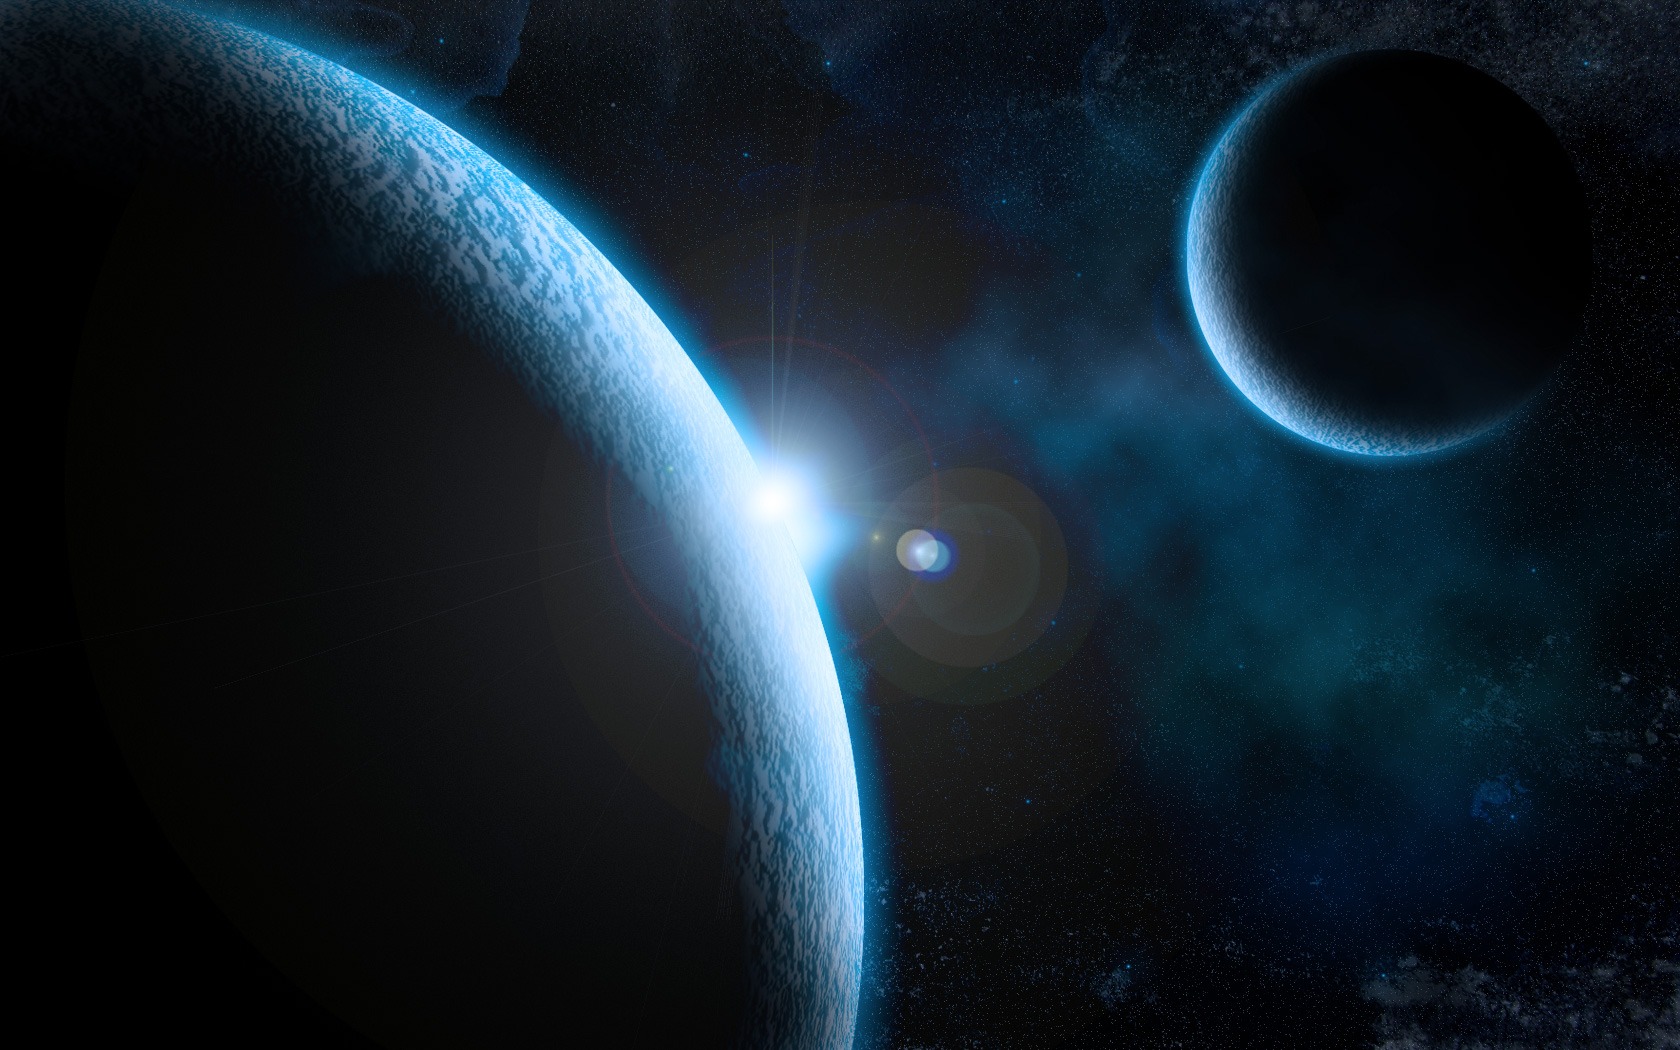
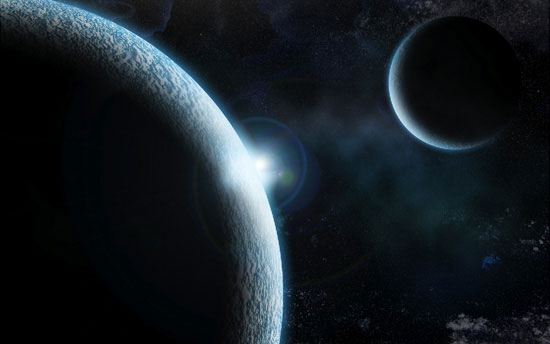
Final result
This tutorial can have two variations, check out both versions below. Remember to click on the image to see the full-scale images of them. The planets’ reflections will be fully adjustable depending on how you want to set up your scene.
At the end, we will look at a few quick ways to give the image a completely different look.
Version 1
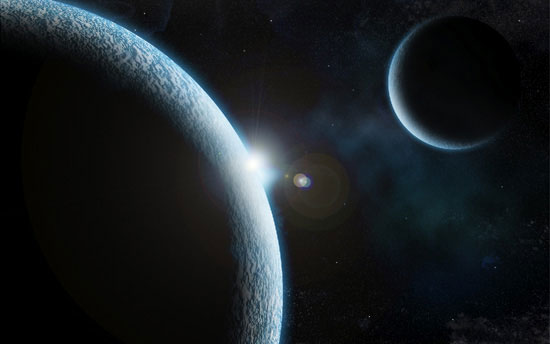
Version 2

Let’s get started!
Getting started: what you will need
- Adobe Photoshop
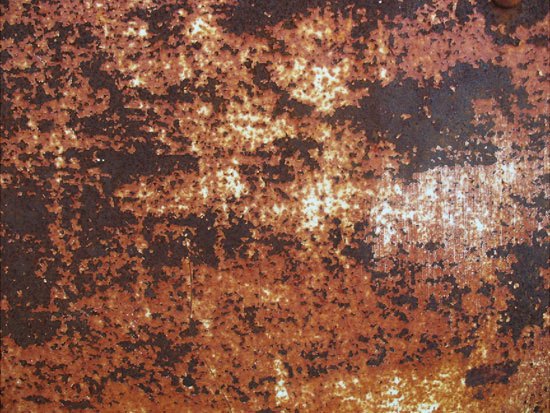
- Rust texture from Zen Textures
- Grunge Paper texture from Zen Textures
1 To start, let’s go and grab our rust texture from Zen Textures and open it up in Photoshop.
Creating the large planet
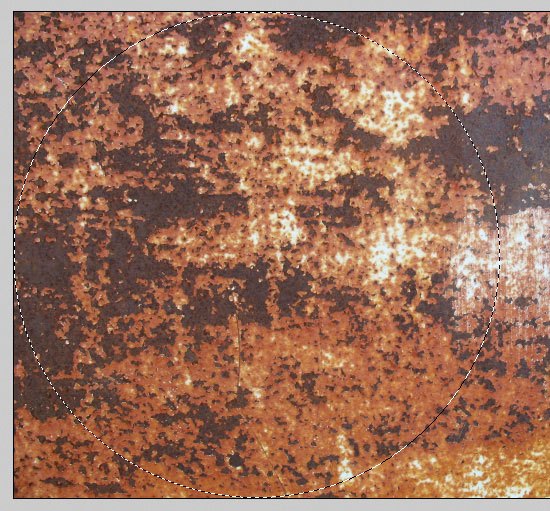
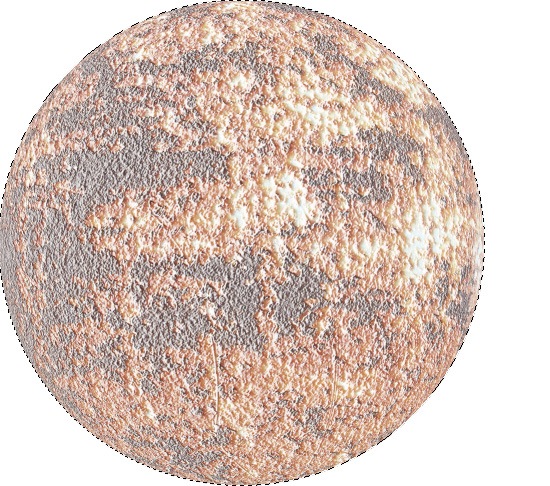
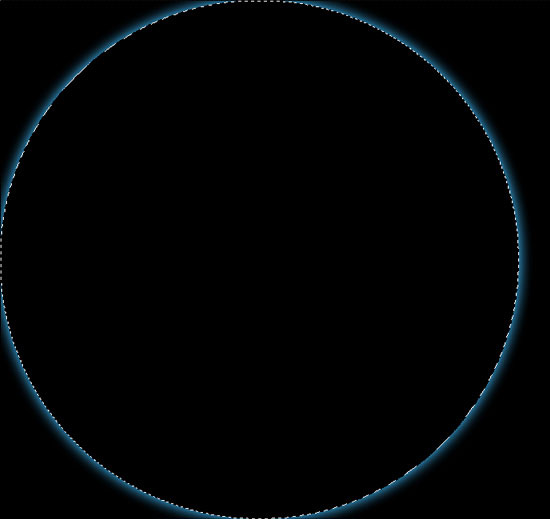
2 We are going to start off by creating our large planet. So, choose the Elliptical Marquee Tool in the Tools Panel and create a circle (holding down Shift to keep a perfect circle) that fills up as much of the area as possible without going off the edges of the document.
3 We want to put that area beneath the circular marquee selection onto a new layer. Press Ctrl + J to duplicate the selection; this should automatically put the selected area onto a new layer.
4 We can go ahead and hide the original texture layer (click on the layer visibility icon on the left of the layer – it looks like an eye).
Now, duplicate the circle layer we just made by pressing Ctrl + J. Go to Filters > Sketch > Bas Relief and use the settings that I have below – this will give us more of a planet texture.

5 Ctrl + click on the circle texture layer to select it. Go to Filter > Distort > Spherize and change the amount to 100%.
6 Add the Spherize filter to the layer we just added the Bas Relief filter to as well.
7 Move the texture layer above the Bas Relief layer and change the texture layer’s Blend Mode to Overlay.
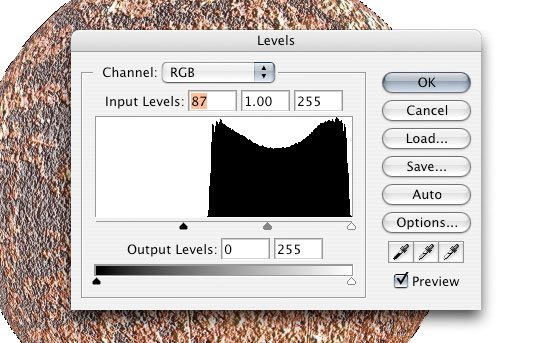
8 Now, we want our planet to have a little more contrast to it and we want it to be darker.
Go into the Image > Adjustments > Levels (Ctrl + L) and adjust the Levels as I have it below.
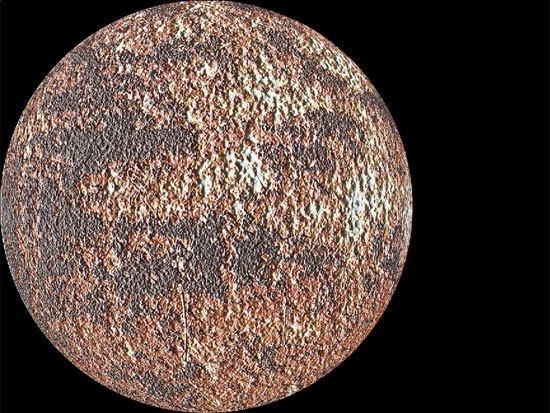
9 Change our Background layer to black (#000000) before we go any further.
10 We are now going to merge the two layers of our planet. To do this, Ctrl + click to select both layers, then click on the Link layers icon at the bottom of the Layers Panel to link both layers. Then, select the top layer and choose Layer > Merge Down or simply press Ctrl + E to merge them together into one layer.
11 Now, we want to create a new group to put our planet in.
Click on the Create new group icon (it looks like a folder) at the bottom of the Layers Panel. Once you create the group, drag your planet layer into it.
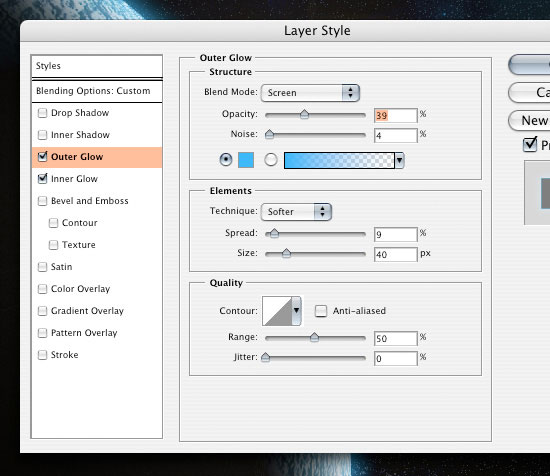
Adding an Outer Glow and Inner Glow layer style
12 Now that we have our planet in our group, we are going to add some layer styles to the to it.
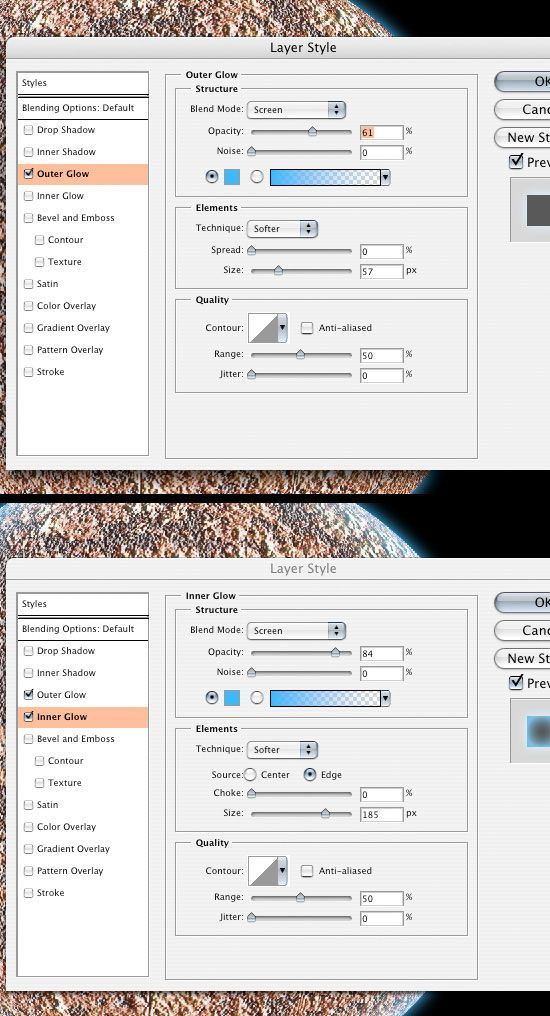
13 Start by clicking the Add a layer style icon at the bottom of the Layers Panel and choosing on Outer Glow. Change your settings as I have them below (the color used is #3EB9F9).
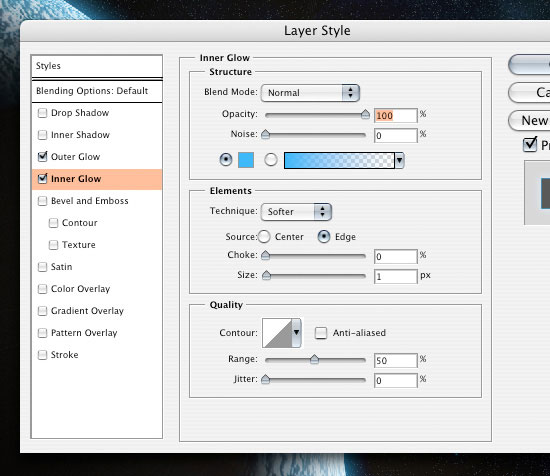
14 Now, add an Inner Glow layer style with the settings I have below using the same color as the Outer Glow layer style above (#3EB9F9).
Adding a layer mask
15 Click on the planet group to make it the active layerl, and then click on the Add layer mask icon (bottom of the Layers Panel).
Inside the planet group, Ctrl + click on the planet layer to get a marquee selection around it and then fill the mask layer we just created with black (#000000) using Edit > Fill (Shift + F5). You should have ended up with just the Outer Glow layer style showing through.
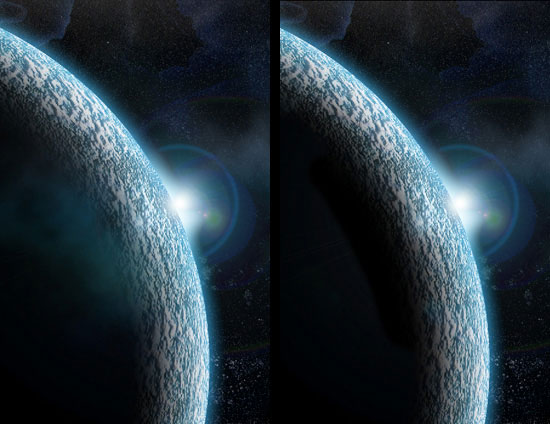
Giving the planet a glowing edge
16 To give our planet a glowing edge on one side, we want to move the mask. To do this we are going to click on the mask, then click on the Link layer icon in between the layer and the mask to unlink them.
We can now move the mask layer using the Move Tool (V) without moving everything else.
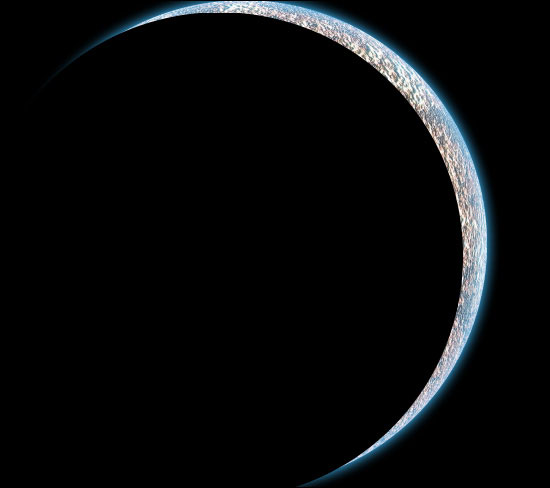
17 Lets go and give our mask a blur so there isn’t such a defined line. Click on the mask layer, and go to Filter > Blur > Gaussian Blur. Change the blur’s Radius option to 50px.

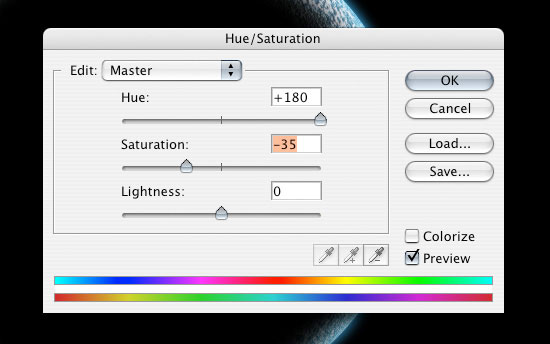
18 The planet looks pretty good but we want to get rid of the rust color and give it more of a “blue-ish” look to blend it in with the glow.
To do this we are going to click on the planet layer and open up the Hue/Saturation Image Adjustment dialog box by pressing Ctrl + U; alternatively, you can get to the Hue/Saturation Image Adjustment dialog box by choosing Image > Adjustments > Hue/Saturation.
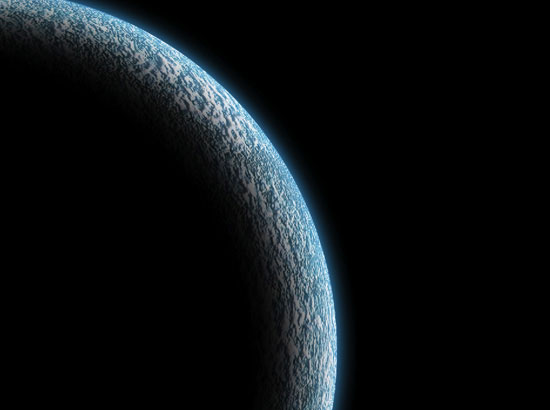
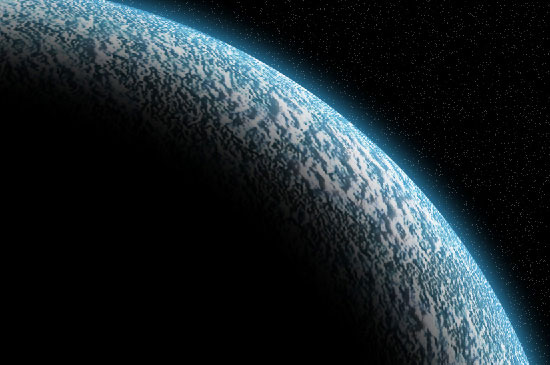
Here is what our planet should look like now.
Setting up the space scene
19 Now that we have finished our first planet, we can create a new document (Ctrl + N) in Photoshop to set up our scene. I’ll create my new document with the canvas dimensions set at 1680px by 1050px.
20 Fill the background of the new Photoshop document with black (#000000) and bring in the planet.
First, link the planet group and the mask together by Ctrl + clicking on them in the layers and clicking on the Link layers icon (or right-click and choose Link layers). Then, drag the layers into the new Photoshop document; this will duplicate the layers into the new document. I reduced the size of the planet to about 95% for a better fit which you can do using Edit > Transform > Scale (but do what you think looks best).
Adding some stars
21 We are going to add some stars in our background.
So first, create a new layer (Ctrl + Shift + N) and place it below the planet group.
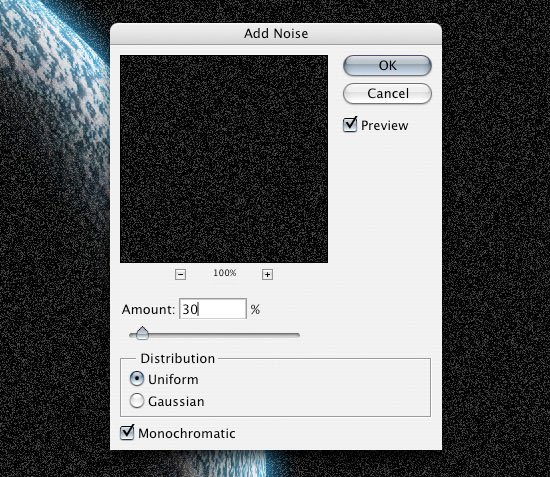
22 Go to Filter > Noise> Add Noise. Make sure that the Monochromatic option is checked and the Amount option is at about 30%.
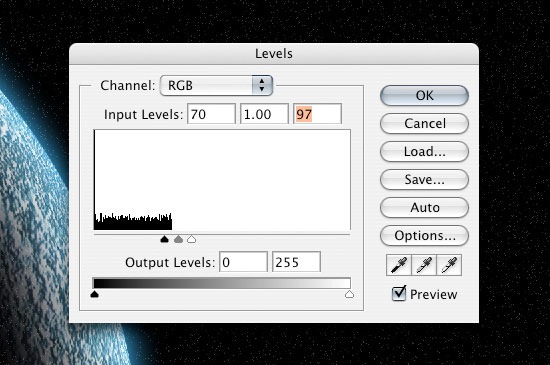
23 To get less white noise and more of a star look, we are going to adjust the Levels by going to Image > Adjustment > Levels (Ctrl + L) and changing the levels so they are something like what I have below. This will give us a higher contrast and make a lot of the noise go away.
24 We don’t want the stars to go in front of the black part of our planet, so add a layer mask to the stars layer.
Ctrl + click on the planet layer to create a marquee selection around it, switch to the newly added layer mask, and then fill the selection with black (#000000) on the mask using Edit > Fill (Shift + F5).
Giving the scene some realistic textures
25 To get more of a spacey feel, we are going to go and grab the grunge paper texture from Zen Textures. Open the texture in Photoshop and bring it into our canvas.
26 Use the Free Transform Tool (Ctrl + T) to rotate and resize the texture so that it fits the canvas. Remember to hold down Shift when you are resizing the texture to maintain the proportions of the texture image.
27 Once we have the texture sized, we want to invert the texture image’s color using Image > Adjustments > Invert (Ctrl + I).
Then we are going to open up our Levels dialog box (Ctrl + L) to lower the amount of white in the texture. Drop the Opacity of this layer to somewhere around 45% for now.

28 Repeat Step 24 (adding a layer mask) to get rid of the star texture that is in front of the planet.
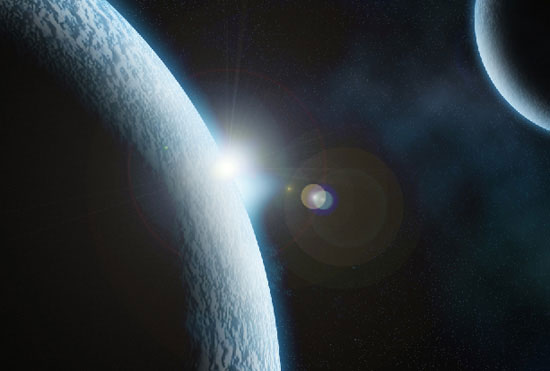
Adding a light source
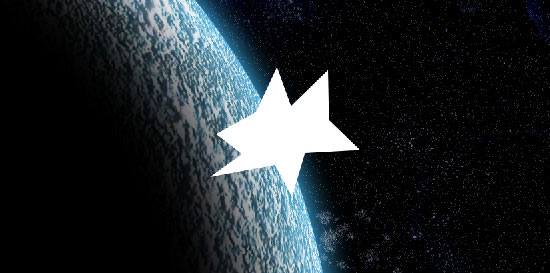
29 We’ll leave the texture as it is for now and we’ll add a light source coming from just behind the planet. To start, create a new layer (Ctrl + Shift + N), and bring it up the Layers Panel so it is at the top of all the layers.
Using the Polygonal Lasso Tool, create a rough star-like shape, something like I have below.
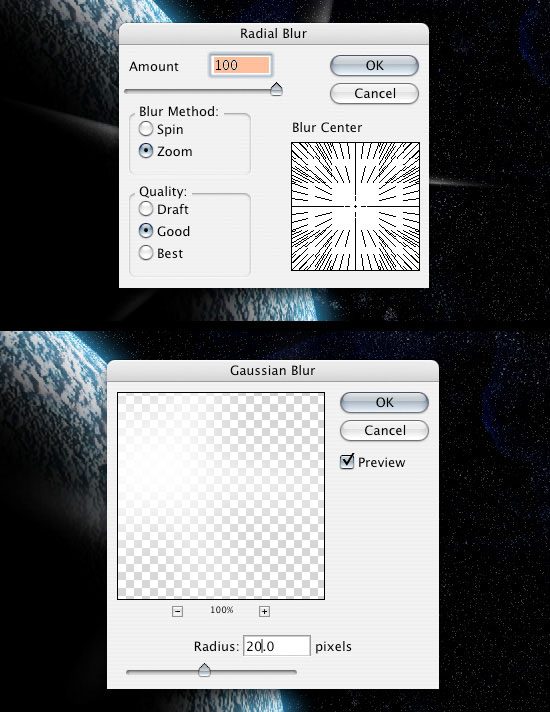
30 Go into Filter > Blur > Radial Blur and change the Amount option to 100 and press OK to apply the filter. This isn’t quite going to do what we want it to, so we want to apply the filter again. We can do this easily by pressing Ctrl + F, which reapplies the most recent filter you’ve used, in this case the Radial Blur filter.
31 Now we want to go to Filter >Blur > Gaussian Blur with the Radius option set to 20px.
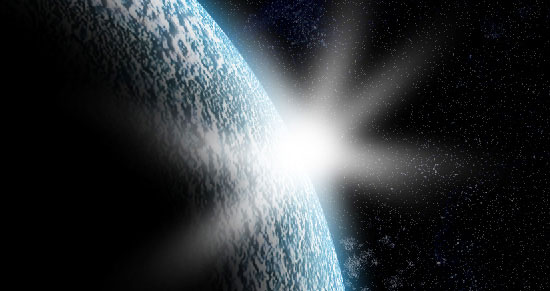
32 We want to duplicate the white area layer (Ctrl + J) and rotate the duplicated layer using the Free Transform option (Ctrl + T) until you get something like what I have below.
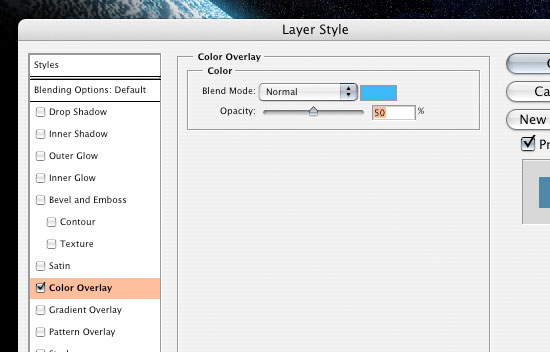
33 Select one of the white light source layers–the one that is lowest in the Layer Panel–and add a Color Overlay to it by clicking on the Add a layer style icon at the bottom of the Layer Panel and choosing Color Overlay.
Use a light blue color (#3EB9F9). You can use the Free Transform Tool to adjust the size and angle of this layer. Also, consider adjusting the Opacity option of the Color Overlay to one that suits your tastes.
I brought the sides of mine in and moved it behind the planet a little more. After you’re satisfied with the light source, move these two layers under the planet.
Using a Lens Flare filter
34 We are going to add a Lens Flare. To do this, we need to create a new layer, fill it with black (#000000) using Edit > Fill (Shift + F5), and then bring it to the top of all the layers.
35 Hide that newly created black layer temporarily (click on the Eye icon beside it, which toggles the layer’s visibility) so that we can set up some Guides for determining where the Lens Flare will be placed.
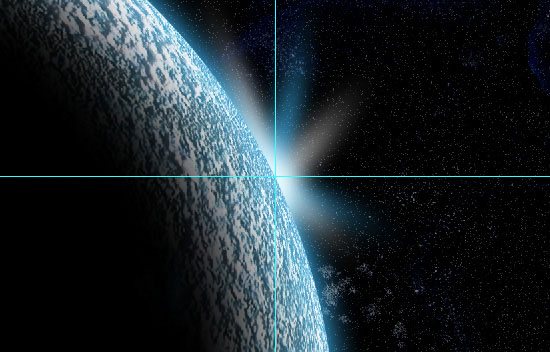
36 Bring a Guide from the top ruler and the left ruler (press Ctrl + R to show and hide the rulers) so it makes sort of a crosshair at the middle of our glare.
You can toggle your Guide’s visibility by pressing Ctrl + ;. Setting up guides allows us to precisely place the Lens Flare.
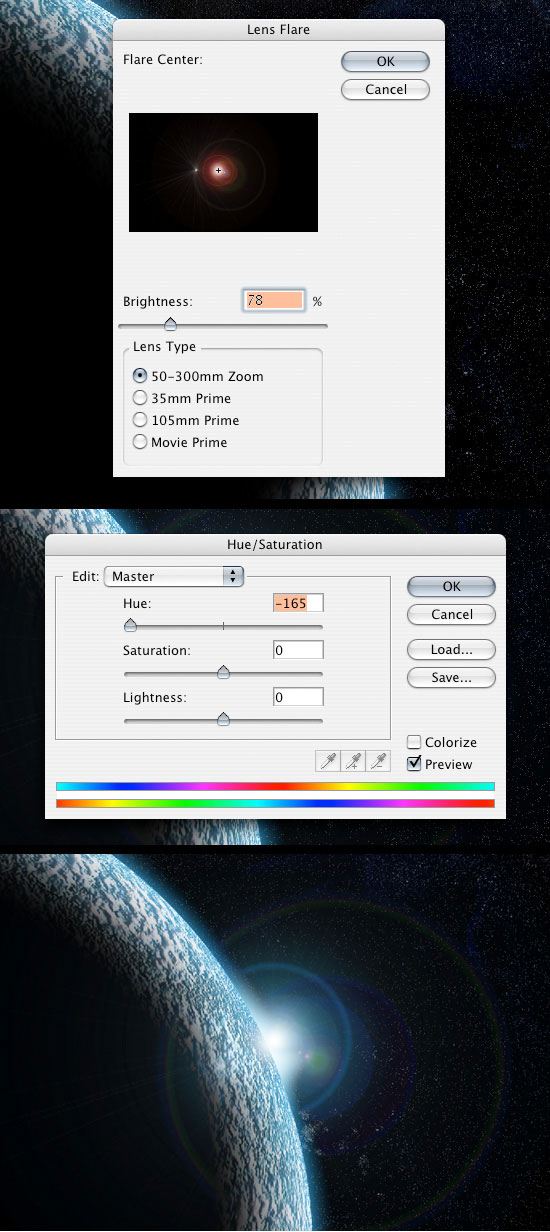
37 Toggle the visibility of the black layer back on, and go to Filter > Render > Lens Flare. Try to line up the lens flare so that it is right at the intersecting point of the Guides we set up.
38 So that our lens flare matches the rest of our image, let’s adjust the Hue/Saturation.
Press Ctrl+ U to open the Hue/Saturation dialog box and adjust the color of the Lens Flare using the settings below.
Create a smaller planet
39 Now, we are going to create a smaller planet. Repeat Step 2 – 18 with a smaller circle. Since you’re already familiar with the process of creating a planet by now, why don’t you play around with the settings and options to experiment with different effects and textures?
Also, don’t forget to add the planet to the star and star texture masks that we did in Step 15 so that the stars aren’t coming through.
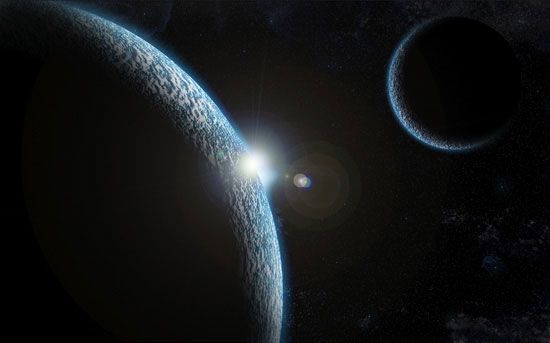
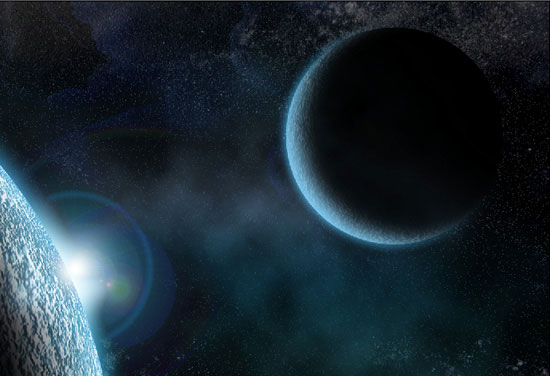
40 When you’re done creating the smaller planet, place it into our space scene Photoshop canvas.
Adding some “space dust”
41 Now that we have both our planets, we are going to add some “space dust”. To start, choose your Lasso Tool from the Tools Panel and change the Feather option (in the Options Bar) to 100px.
42 Draw an organic, cloud-like shape in the middle of the two planets. It doesn’t have to be perfect and if you have any sharp corners, the 100px feather will smoothen them out.
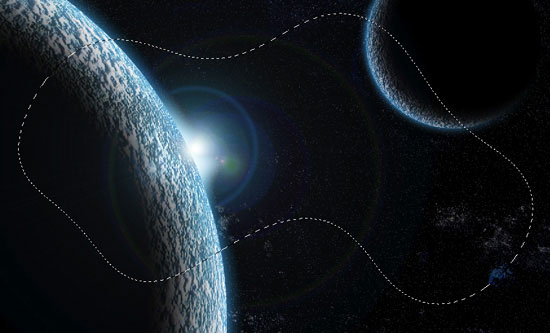
43 Create a new layer (Ctrl + Shift + N) behind everything except the stars and background texture.
Set your foreground color to black (#000000) and background color to white (#FFFFFF) then go to Filter > Render > Clouds.
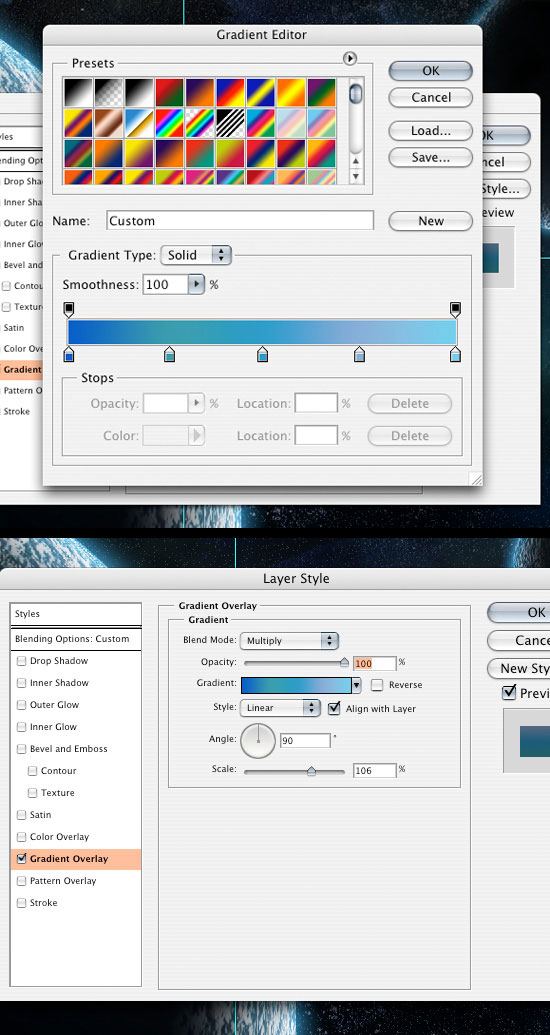
44 Add a Gradient Overlay layer style by double-clicking on the newly created layer to open up the Layer Style dialog box and then checking the Gradient Overlay box. Create a cool blue color gradient with various hues and adjust your settings like I have below.
45 We are going to add a layer mask (click on the Add layer mask icon at the bottom of the layers panel) to the cloud layer because if you have some of the clouds showing in front of either one of the planets, we want to get rid of it.
46 Choose the Brush Tool (B) from the Tools Panel, and then using a black (#000000) foreground color, start painting away the parts of the clouds that we don’t want.
Adding a light reflection
47 Now we are going to add some reflection from the light onto our planets; let’s start with the smaller one.
Ctrl + click on the small planet layer to create a marquee selection around it.
48 Create a new layer at the top of the small planet group and fill it with a light blue color using Edit > Fill (Shift + F5); use a color that’s something like #88D6FC. Since our group already has the mask, the blue fill will be applied to it as well. Drop the opacity of this new layer down to 40%.
49 To get a bright highlight, we’re going to recreate the marquee selection on the small planet by Ctrl + clicking on the layer.
Then create another layer (Ctrl + Shift + N).
50 Choose the Brush Tool (B) again with the Diameter option set to about 100px, Opacity option 20%, and Hardness option to 0%. Start painting in the front part of the planet that is facing the light source with a white color (#FFFFFF). You should get something like what I have below, something pretty subtle, but still noticeable.

51 We are going to start giving our big planet a reflection as well.
So first, like in the preceeding steps, we are going to create a new layer in the big planet group and fill with a blue color (#88D6FC) or something similar. Drop the opacity down of this layer to 70%.
52 Lets get rid of some of the blue reflection because the light reflection is going to be right around the light source. To do this, we are going to add a layer mask.
53 After adding the layer mask, set your foreground color to white (#FFFFFF) and background color to black (#000000).
Now choose on the Gradient Tool (G) and set the gradient type option to Reflected Gradient (second to last gradient option). Click and drag the gradient from the middle of the light source down to the bottom of the canvas. This should get rid of the blue tint that is on the top and bottom of the big planet.
54 Just as with the other planet, we are going to make a white area where the largest amount of highlight will be.
Ctrl + click on the planet and create a new layer. Start painting with our same sized brush as in Step 50. Your reflections should look something like what I have below where it doesn’t go too far around the planet and is brighter at the light source than the smaller planet.
Some final adjustments and details
55 I didn’t really like the lens flare as I continued to work on the scene, so I adjusted it to get something a little better and more visible. The brightness of the new Lens Flare is set at 80% and at 105mm Prime instead of the 50-300mm Zoom that it was at before.

56 I’m going to go back to the background texture for the stars. Now that we have it in with everything else, Drop the opacity down to 30%.
Using the mask that has already been applied to our background star texture, start painting away with our 20% opacity brush the “white-ish” areas at the bottom left because they look a little out of place. I’m not going to get rid of the areas completely, just dropping the opacity of them down some.
57 Now, we are going to put in some brighter stars to make the background pop a little bit. Create a new layer above the star texture layer and choose the Brush Tool (B) in the Tools Panel.
Change the settings of the brush so that the Opacity option is at 100%, the brush’s Diameter is at about 5px, and the Hardness is at 0%.
58 Place a few dots/stars around the document in between the planets using white (#FFFFFF) as your foreground color.
59 Now, we are going to add some layer styles to the stars. First, add an Outer Glow layer style. Adjust the settings something as I have them below, using the color #3EB9F9.
This will give our stars a nice subtle glow.
60 Nest, we’ll add an Inner Glow layer style. This will give our stars a blue tint, while still maintaining the white center to give them a bright glowing look.
61 Drop the opacity of the layer down to 70% to blend them into the background a little. We don’t want them to look unnaturally bright or stand out too much.
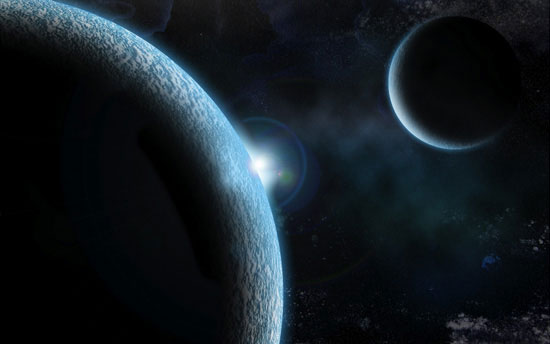
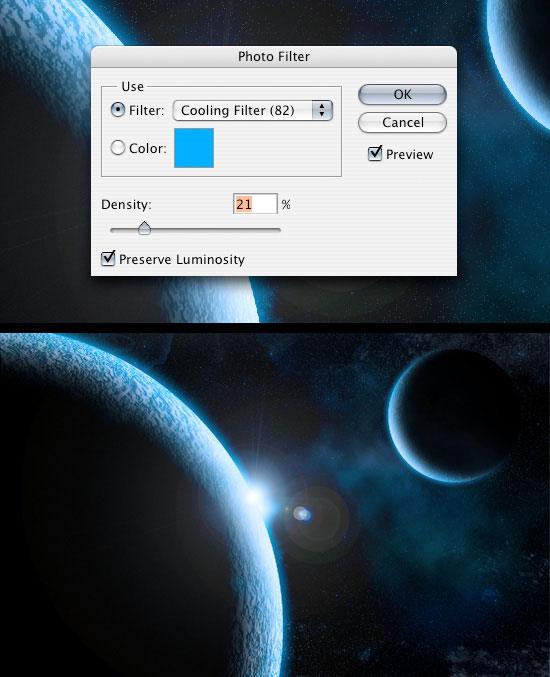
62 Now, let’s add a Photo Filter adjustment layer to make everything the same tone/color so it all blends well.
Click on the Create a new fill or adjustment layer icon at the bottom of the Layers Panel (it’s usually the fourth icon from the left) and choose Photo Filter. You can play around with the different filters until you get something you like. I used a Cooling Filter with the Density option set at 21%.
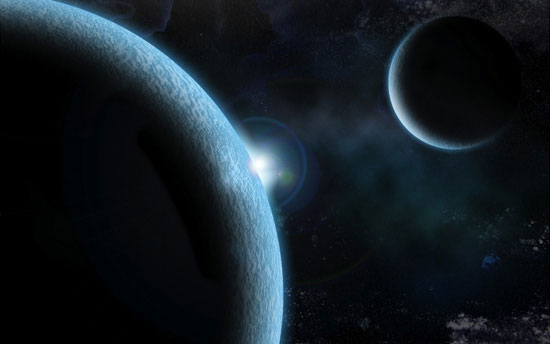
Alternate final result (Version 2)
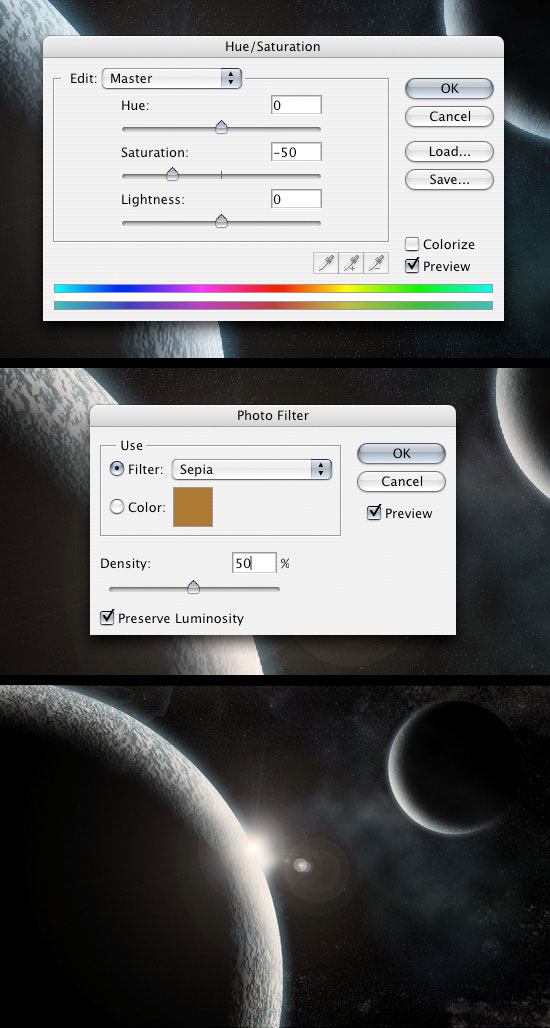
63 You may want the scene to have an aged, retro look.
To do this, we need to hide the Photo Filter adjustment layer temporarily (click on the eye icon to toggle the layer’s visibility off). Add a Hue/Saturation adjustment layer using the same method as adding a Photo Filter adjustment layer. Drop the Saturation option down to -50.
Now go into our Photo Filter adjustment layer and change the Filter option to Sepia.
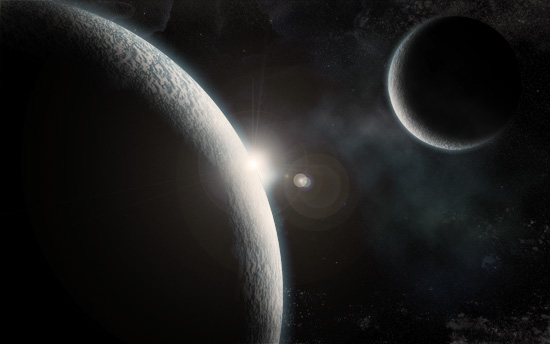
We’re done!
So there we have it, a planet made from just textures and Photoshop with two possible outcomes.
Version 1
Version 2
Share your own work on Flickr
Play around with it a bit more, and share your work with us by uploading it onto the Six Revisions User Group on Flickr!
Download the source file
You can download the source file of this tutorial below.
- realistic-space-scene.zip (ZIP, 18.8 MB)
Related Content
-
 President of WebFX. Bill has over 25 years of experience in the Internet marketing industry specializing in SEO, UX, information architecture, marketing automation and more. William’s background in scientific computing and education from Shippensburg and MIT provided the foundation for MarketingCloudFX and other key research and development projects at WebFX.
 -

WebFX is a full-service marketing agency with 1,100+ client reviews and a 4.9-star rating on Clutch! Find out how our expert team and revenue-accelerating tech can drive results for you! Learn more
Make estimating web design costs easy
Website design costs can be tricky to nail down. Get an instant estimate for a custom web design with our free website design cost calculator!
Try Our Free Web Design Cost Calculator
Share this article


Web Design Calculator
Use our free tool to get a free, instant quote in under 60 seconds.
View Web Design CalculatorMake estimating web design costs easy
Website design costs can be tricky to nail down. Get an instant estimate for a custom web design with our free website design cost calculator!
Try Our Free Web Design Cost Calculator


