

In this tutorial, we'll make a creative blog layout using mostly simple shapes, a few brush techniques, some images, and a dose of Photoshop ingenuity. Creating web design layouts is easier than you may think. You can learn to build attractive designs rapidly. Creating this design will take less than two hours and you'll learn some professional tips along the way. Let's get started!
Final Image Preview
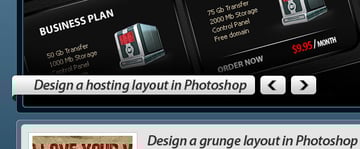
Take a look at the image we'll be creating. The final image is below or you can view a full size image here.
Tutorial Details
- Program: Adobe Photoshop CS4
- Difficulty: Intermediate
- Estimated Completion Time: 1.5 hours

Resources
To complete this tutorial you need to download the 960 Grid System. Now let's begin.
Step 1
Open the "960_grid_12_col.psd" template in Photoshop. It will look like the image shown below. The Grid System is useful because it allows you to align the layout quickly.


Step 2
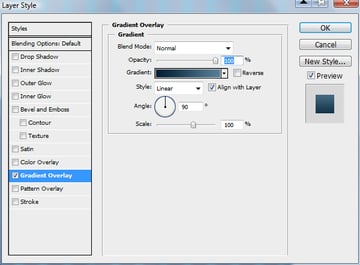
Select the background layer and press Command + J. This is the shortcut to duplicate a layer. Using shortcuts will speed up your design process. For this new layer we'll add a nice gradient color. Now go to Layer > Layer Style > Gradient Overlay and use the following settings.


Step 3
Now hide the Grid because to see the design better. Keep your grid visible because you can align the shape better. Select the Rounded Rectangle Tool, and create a shape on top of the layout.


Step 4
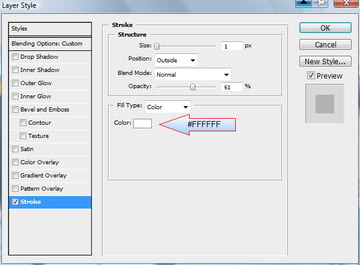
For this navigation bar add the following layer styles.


Step 5
Using the same tool (Rounded Rectangle Tool) create another shape and fill it with the color: #001424.


Step 6
Add the following layer style for this shape.


Step 7
Create another shape with the Rounded Rectangle Tool using white for the color.

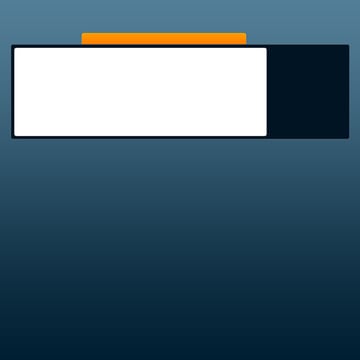
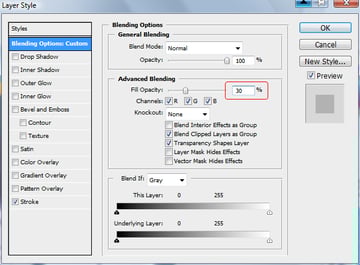
Step 8
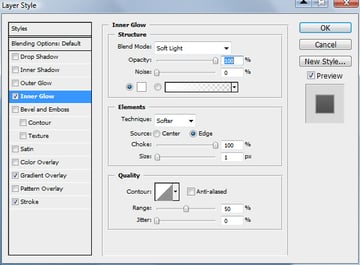
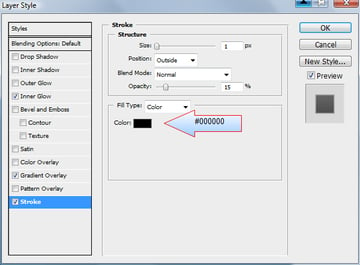
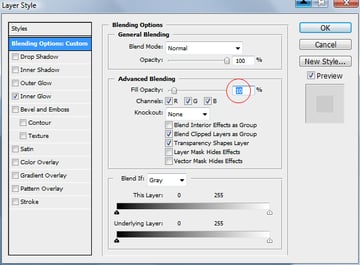
Also for this shape add some simple layer styles and change the Fill value to 10%.


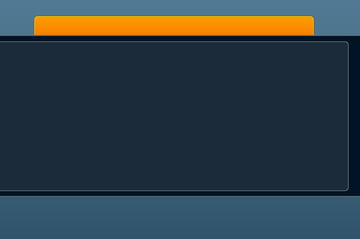
Below is the result so far.

Step 9
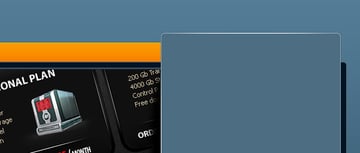
Over this last shape place an image. I've use some images from some tutorials I've made for Grafpedia, which serve as good image examples for this design. You should use your own images though of course.


Step 10
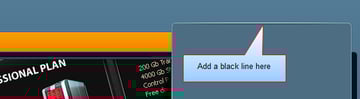
Now you need to load the selection for this image. To load the selection, select the layer in your layer palette and then go to Select > Load selection. You will see a selection around the image like in the following image.


Step 11
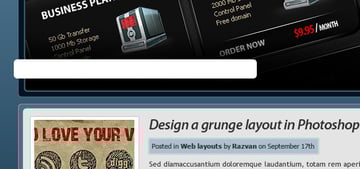
Create a new layer on top of all layers by using this shortcut: Command + Shift + Alt + N. Select the Brush Tool, and choose a smooth round brush. Over the new layer draw a horizontal line. Hold down the Shift key when you make the drawing. In this way the drawing will be perfect horizontally.


Step 12
Press Command + D to deselect. Now use the Rounded Rectangle Tool to create another shape with the color #4b6e82.

Step 13
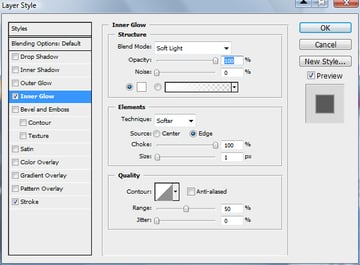
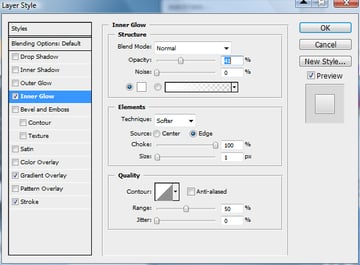
For both shapes add the following layer styles.


Step 14
Grab the Ellipse Tool and create a shape right under the sidebar shape.


Step 15
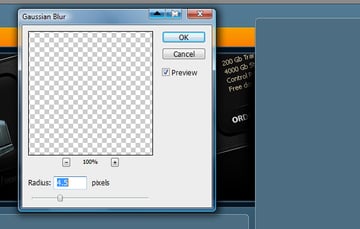
Go to Filter > Blur > Gaussian Blur and use the following settings. Photoshop will ask you if you want to Rasterize the shape, go ahead and press OK.

Step 16
As you can see from the previous step, we've created a shadow there. Now let's accentuate this shadow by adding some lights. Select the Line tool, and set the weight of the line to 1 pixel and then create a vertical line as shown.


Step 17
Right-click on the layer and choose Rasterize layer.


Step 18
Select the Eraser Tool, and choose a smooth, round brush at around 100px. Use it to Delete the top part and the bottom part of the line.


Step 19
With the same technique create another line on top of the sidebar.

Step 20
Right under this white line create another one that is black.

Step 21
In the middle of the layout create another shape with the Rounded Rectangle Tool.


Step 22
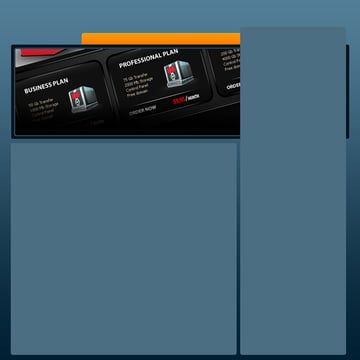
Create some shapes with the Rectangle Tool. Over these shapes we'll add some images later.


Step 23
Add the same layer styles for all these three shapes.


Step 24
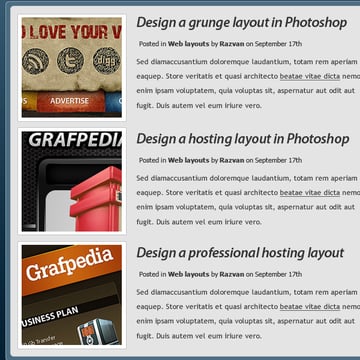
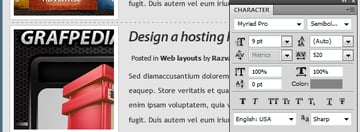
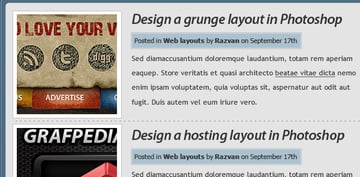
Now it's time to add the images over these white shapes. Also add some text with Horizontal Type Tool on the right side.

Step 25
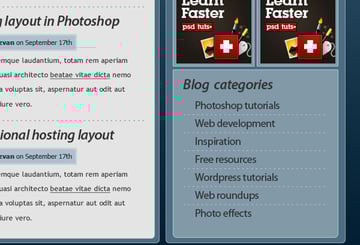
Create a dashed line between the posts with the Horizontal Type Tool.

Step 26
Create another three shapes and place them under the Post Metadata text.

Step 27
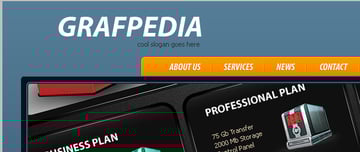
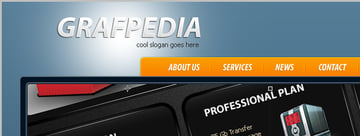
Above the sidebar create a search box using the Rounded Rectangle Tool. In the same time you can see that I've placed some text over the navigation bar too.


Step 28
Please add the following layer styles for this search box.


Step 29
Now use the Rounded Rectangle Tool to create another shape. Place this shape over the previous shape. Also, add an icon on the right side.


Step 30
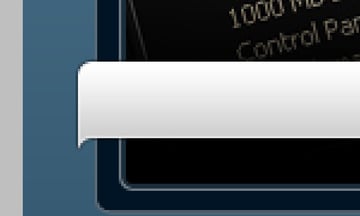
Right above the slide show create another white shape.

Step 31
Add the following layer styles for this shape.


Step 32
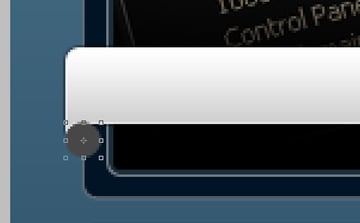
Hold down the Command Key and with the Pen tool selected press on the edge of the shape twice. The anchor point will become active and we'll be able to modify the look of the shape.


Step 33
With the Command key still pressed select the following anchor point.


Step 34
Hold down the Shift key and press once on your Down arrow key from your keyboard. The anchor point will move down and you will have the following result.

Step 35
Use the Ellipse Tool to create a circle.

Step 36
Right-click on the layer and choose Rasterize Layer. With the Rectangular Marquee Tool make a selection like that shown below.


Step 37
Be sure you have the layer with this small circle selected and then press the Delete key. Drag this layer above the background layer in your layer palette. This is my result so far.


Step 38
Now we'll add two buttons to allow the sites users to change the slide show image. You will need to use the Rounded Rectangle Tool to create the shape and then you can use the Custom Shape Tool to add the arrows.

Step 39
Over the sidebar create some white shapes as shown below.


Step 40
For all these white shapes please add the same layer styles.


Step 41
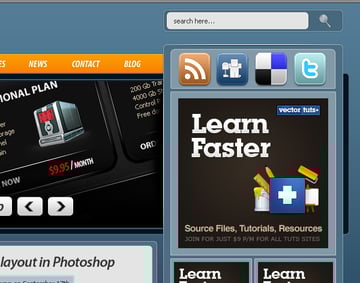
Add some banners in the sidebar. Also, add some social bookmarking icons on top of the site design. There are numerous free icons available across the web to choose from.

Step 42
Now add some text with the Horizontal Type Tool on the bottom of the sidebar. Also, add minus signs between the text using the Horizontal Type Tool to create dashed horizontal rules.

Step 43
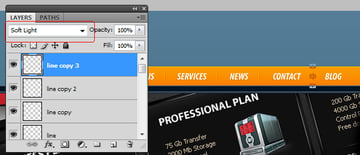
Let's add other details on the navigation bar. Use the Line Tool to create two small lines. Zoom into this image so you can see better what you're doing.

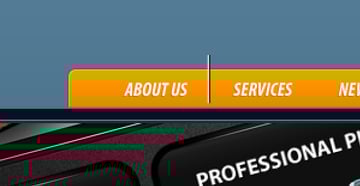
Step 44
Select both layers inside your layer palette. To select both layers you need to hold down the Command key when selecting both layers. After you have the lines selected press Command + E to merge the layers into a single one. Select the Eraser Tool and use it to delete the top part and the bottom part of the lines. Please note that you need a soft, round brush with a size of 20 pixels.


Step 45
Change the blending mode for this layer to Soft Light. Duplicate it a few times and place the line between the other text buttons.

Step 46
Now create the text for this Wordpress layout's logo at a size that looks good to you.

Step 47
Add the following layer styles for this text logo.


Step 48
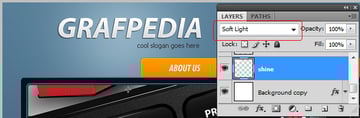
Right above the "background" layer create a new layer (Command + Shift + Alt + N). With the Brush Tool make a highlight mark there with a soft, round brush as shown.

Step 49
Change the blending mode for this layer to Soft Light.

Conclusion
The design is completed! I hope you enjoyed creating! The final image is below or you can view a full size image here.


